It's a fact, I miss blog reads at Christmas. I spend Christmas alone, and then go visit my DD, DSL, DS, and DGS ( gosh what a lot of acronyms...my daughter, my son-in-law, my son, and my grandson) during the week after Christmas and up through New Years Day. It's what we've done for years, ever since the kids moved on, had their own homes, got married, and etc.
So I love reading blog posts around Christmas!
My contribution (first of several) to any of you who share this blog reading deficit.
This afternoon I sewed up some special gifts for Ashley and Darrin. And their kitties Nikita and Callisto. I LOVE these kitties. I stay with them a couple times during the year when Ashley and Darrin are traveling. And it is such a pleasure. I would love a couple cats, but I'm allergic. Callisto and Nikita are tortoiseshell cats, sisters and amazing.
So the kitties win this Christmas...new cuddle beds.
I looked up cat bed patterns online, and even looked at them at retailers. Here's what I decided. Nobody makes them the way I can!
 |
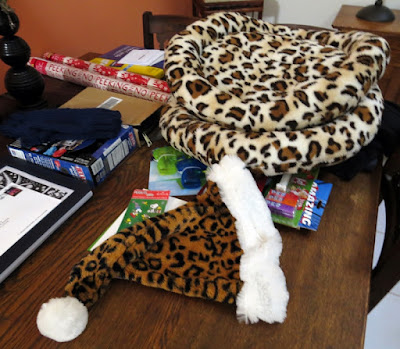
| No channel stuffing - 22 x 25. The center of the bed is quilted. |
I drafted a pattern about 22" x 25" - an oval that would included 4" bunkers all round, with an eventual bed of about 14" x 17".
My plush blanket fabric is from A.C.Moore! They usually have these 50" x 70" blankets hanging around the sewing crafts area, and they did not let me down. I got 2 leopard print blankets for about $8 each. And picked up a bag of fiberfill to go with.
So - the construction. This fabric is very forgiving - it has much more stretch across the horizontal than fleece. So I just cut out my pattern, serged it right sides together (to diminish the fluff factor in the loft), and then sewed just inside the serging, for strength. Leaving a 5" opening for the fabric turn...
I turned the bed right side out, and stitched 4" inside to form the rim of the bed - but I once again I left a 5" opening to that I could work some polyfill inside the bed.
 |
| Stuffing in 1/2 of the outside channel - you can see it starting to form the rim of the bed. |
As you can see in the photo above, I machine quilted the bottom of the bed. At about 4" x 4", just enough to combat the kitty dough kneading. Then I closed that entry way with machine stitching.
And I stuffed the rims! I wear a size 7 glove, so the 4" channel worked well for me. Do you know your glove size? I was raised with gloves, an entire wardrobe of gloves, so I know my size. Anyway, I have fairly large hands, width wise, and very long fingers. So, size 7. And a 4" wide channel.
 |
| Stuffed rim/channels! |
I packed the channels pretty firmly so the kitties can cuddle up to them. How much stuffing did it take?
I used 32 oz. of fiberfill, 16 oz. each, to stuff the channels on these kitty beds, and small (about 14" x 17" ) ovals of low-loft quilt batting, on the inside area that I quilted, the bottom of the kitty bed.
You could just stuff the bottom of the bed with about 8 oz. of fiberfill, if you prefer. Or just sew in a piece of flannel or something soft instead. I always have quilt batting hanging around, and it's really easy to use for this project. In truth, I robbed from a quilt in progress for this project! and will have to replace it.
Fun stuff - I'm happy! The kitties will really like these, and what makes them happy makes Ashley and Darrin happy.
Great kitty beds. I have lots of leftover fabric, at minimum I'll make some 5" long playthings with catnip involved to go with. I'm also thinking I'll make Archie, David and P.'s french bulldog, a couch blanket. Archie always comes up on the sofa when I'm napping, and curls behind my knees. I think he would love a soft blanky.
It's Christmas Eve - Ciao! Coco


