Tuesday, March 31, 2015

McCalls 6966 - nice skirt!


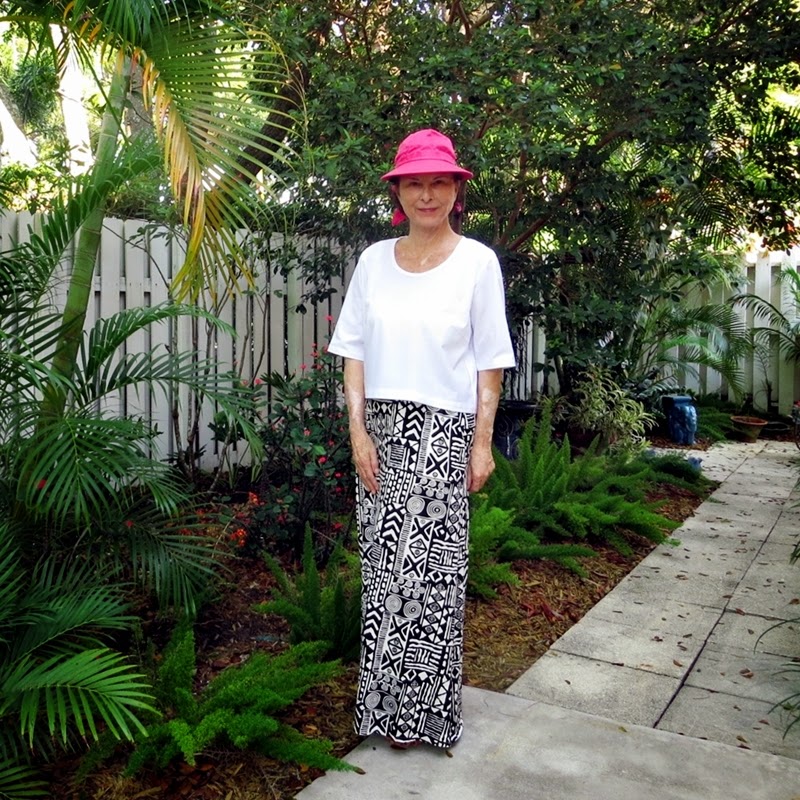
Way out...this fabric is neon!

I had no idea this cotton/lycra knit from Fabric mart was so bright when I ordered it...but it was kind of fun to find some way to use it :-)

I looove knit maxi skirts. What a great excuse to be comfortable (as in pajama comfortable) and trendy at the same time. I've been making mine sort of free-hand from a pattern I drafted a couple years ago. Blogged here and  also seen again here...

Enter McCalls 6966. It's fuller than my self-drafted pattern, and it has piecing options. I just had to give it a go.


I really like the extra volume. Swingy...


I sewed the size Medium, which has a generous hip measurement of 46", for my 41" hip. I really don't want cling at that particular spot. 

I made only a couple changes to this delightful skirt: 
  • I added 3" to the length.
  • And changed the waistband!


Having read the reviews online (thank you, fellow bloggers), I wasn't crazy about the upper yoke and waistband on the pattern. So - I left off the top 'yoke' piece, discarded the waist design, and drafted a yoga waistband instead.

It's so easy to make a yoga waistband. Just cut a rectangle across the stretch of a knit, 2 inches or so less than your waist, and about 12" wide. I use a 12" width, because the resulting 4" or so folded waistband fits well on my waist. You might like something different.

Seam the short ends together. Then fold in half across the length, and sew to the top edge of the skirt as a band, wrong sides together. If you've sewn a band onto a knit tee, you've done this. There are lots of online tutorials for doing this... just google 'yoga waistband' and find one you like. 


Great for knit skirts and pants and knit pajamas!

More pics (I'm wearing a cotton/spandex Plantain tee with elbow-length sleeves in all of these):


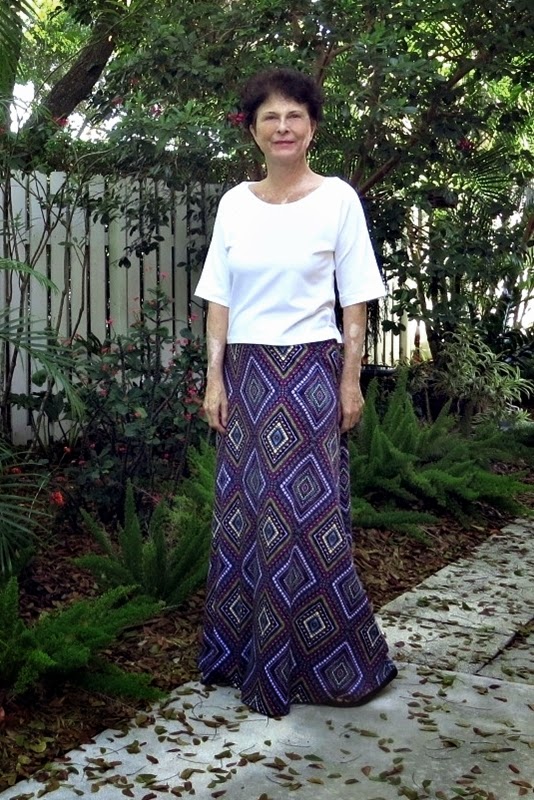
All those leaves in the garden - it's our Florida version of fall, when all the mahogany tree shed their leaves. To compensate, the orchids in the guava tree are blooming...


Happy to respond to any questions on the skirt/waistband, just send an email. Bye for now - Coco

Friday, March 20, 2015

The Scout Tee revisited


Spring! Time to revisit the Grainline Studio Scout Tee. I made it a couple years ago and kind of moved on. Yes, it was hard looking at all the Scouts that were being sewn and reviewed back then. But without a bust dart, the tee just didn't fit me well. Other patterns beckoned.

A few days ago, I was going through my white blouses (my favorite color for tops) and decided I need a couple more. Something in a cool cotton, but with a bit of a sleeve. Lightbulb moment - why not work on the Scout Tee.


Adding a bust dart is really easy. Slash 3 times, spread, and cure - the Fit for Real People method. The pics below are from a tutorial on BurdaStyle, which uses the same method.


My only additional change was to narrow the side seam towards the bottom edge.


The sleeve alteration is easy as well. Jen has a tutorial for it on Grainline Studio! My new sleeve is 15" long, measuring from the top shoulder notch, and includes a 1.25" hem allowance.


Oh, I also cropped the tee - turned it up 4.5". 


Fabric: Paper White cotton broadcloth shirting from Fabric Mart. The skirt is a cotton jersey tribal print from Girl Charlee. And the pink hat is from CVS!


I really like this cropped look for summer skirts and  pants. Other things happening...changes in the garden (with help!).  I've been slowly filling in the 'warm' end of the garden - 3 additional areca palms,  a couple epidendrum radicans ground orchids, heliconia, and flax. I also put 11 philodendron bipinnatifidum in front of the fence. Funny, the birds don't like the white fence - but the philo's will be big and full in no time. This is Florida!


Bye for now - Coco

Saturday, March 14, 2015

Simplicity 1804 Knit Dress - a little different

I'm still using up fabric I bought to muslin my Mother of the Bride dress - like 6 yards of this cotton/poly jersey from Girl Charlee. The print is not quite my favorite, but the fabric is a perfect weight for this maxi from Simplicity.


The pattern has been around for several years, and I've given it a pass a couple times. But I liked the idea of the cut-on sleeves on View B and the little twisted front drape on View A. Worth a go...


In the end, I left off the drape and reshaped the sleeves :-) And my favorite part is the shape and fit through the bodice.  


Just a few sewing notes:
  • Sewed a size 14, which has a bust of about 37".
  • Raised the front neckline 2 1/2". The original neckline was low...which is OK for an evening dress, but not exactly comfortable for out and about. I've seen this worn with a cami to fill in the neckline. But why wear more clothes!
  • Lengthened the bodice, front and back by 2 7/8". Otherwise the gathers would have been right at my bust apex. I've noticed that a lot of sewists have made this adjustment to the pattern.
  • Added 4" to the skirt length, based on the waistline mark. But ended up removing 4" and still taking up a 1 1/2" hem! And I'm 5'7". Crazy. 
  • Left off the waistline seam elastic - the fit is close without it, I'm not sure why it's suggested.
  • Changed the sleeve by lopping off the pointy parts. I made them to the pattern first, but...no. I really did not like the points! Without them, the sleeve looks like a long butterfly sleeve.


I'm not over the moon on this one, but I think it's my fabric (that print)...the dress is really comfortable and has good lines. The bodice is so pretty - I'll try it again.


Bye for now! Coco

Tuesday, March 10, 2015

Terra Pants - Fantastique!


Okay, I love these Terra Pants from Pattern Fantastique!

I think that, every once in a while, one hits on a pattern that just works - it feels right, looks right, is interesting, unique, and fun to sew. I've had such a good time the past 3 days, sewing this funky muslin of the Terra Pants.

It was hard to find any pics of these pants. I found a couple that weren't very telling, so I decided to just give it a go and hope I didn't end up looking bow-legged and drowned.


Actually, they're really cute, extremely comfortable, and, yes, a little bow-legged.  They also fit incredibly well! I love the narrow look at the waist that is accentuated by the fuller cut going down. And I think the cropped length provides a perfect balance.


It's so hard to see any details with all these dots, but here are a couple closer looks at the waist area. A nice wide waistband, chunky belt loops (a narrow loop pattern is included as well), and an open pleat on each side...


The slant pockets are structured, bagged, and sewn like those on a man's trouser - I think they're lovely and by far the nicest draft I've ever sewn.


A couple sewing notes:

  • I sewed the size 12. Nita-Jane and Ben, the designers/pattern makers, advise a smaller size to lift the waist and achieve a slimmer look. And a larger one for a more relaxed look, with a slouchy dropped front waistline.
  • I split the waistband at the center back (as on a trouser) and sewed the center back seam last, after attaching the waistband. This is a great way to keep the door open for backside and waist adjustments. 

Center back just prior to closing it up.

  • I had to redo the zipper insertion completely. The seam allowance in the crotch is only 1cm, and the instructions just can't don't set the zipper back far enough to hide it. Being a good sport, I first sewed the zipper using the instructions...then took it out, added width to the seam with a folded band, and redid the insertion. Ah. Won't do that again - I'll be using a 5/8" allowance for both the back and front crotch seams in the future.

    If you need help with the zipper - Jen, at Grainline Studio, has a great tutorial as part of her Maritime Shorts sew-along. Note: please increase your crotch seam allowance to 5/8" before you cut your fabric!

  • And I used a hook-and-bar closure at the waist, instead of a button. Buttons under a belt buckle make me nutsy.
  • The instructions. The drawings are great and the text is awful :-) If you have experience sewing trousers, you won't have any problems. If not, prepare to read carefully and perhaps back up your understanding with a google for more info. 
A view of the back, which has single darts and a nice fit. I opted out of the back pockets for this muslin, but the pattern comes with both patch and welt pocket patterns...and even directions for either a single- or a double-seamed welt!


Well, these are my new spring/summer pants! I've already ordered two print denim fabrics, and I also have a solid marigold twill that will make a 'dressier' look. I plan to crop this Salme Pleated Tee shirt (I'm not fond of fussing around with tucking in a shirt) and also make a couple cropped Pattern Fantastique Aeolian Tees to go with...


Ciao! Coco

Sunday, March 8, 2015

Happy International Women's Day!


                  Joy!  Coco

Tuesday, March 3, 2015

Lucinda...town, yacht, or pants?

Fabric: Laguna stretch knit in emerald...the last of it!!

Kind of quirky, but I always look up the name of patterns put out by Indie designers. Like the Aeolian tee shirt (Aeolis, western Asia Minor, populated by the Greeks before 1000 BC?) Now I've sewn the Style Arc Lucinda pants. hmmm. A tiny town on the north east coast of Queensland. A steam yacht commissioned by the Queensland government in the late 1800's. Neither of the latter?


I was drawn to the clean lines (and cute drawing) of these knit pants and decided to give them a try. Style Arc made it much more affordable with their Etsy site - this PDF version was USD $8.50, and included 3 sizes (I ordered the 10,12,14 option). The new site, which is PDF versions of all their patterns, has me back in the game. Just the shipping from Australia is USD $14, which made the printed patterns really dear.


This must be a very new pattern. I found only one post, by sewing on the edge - thank you, Barbara! And no pics on real people from Style Arc. 

A few comments on the pattern:

  • Sizing - Style Arc provides finished garment measurements for a size 10. Somewhere, and I cannot remember where or find it again, I read that they have 2" grading difference between sizes. I laid out the pattern in both the 12 and the 14. Sure enough, 2" difference, 10 to 12 to 14.

    Caveat - these are knit pants. While the 14 has a generous waist and reasonable hip, I was concerned about the upper thigh measurement. Not the hip - on the leg, the thigh. The lower love handle place. Very few pattern makers provide this measurement. Yes, I'll share! On the 12, 4" below the crotch seam line, 24". On the 14, same place, 26". 
  • The seam allowances are only 1/4". I drafted my tissue with 1/2" seam allowances and sewed with a 1cm seam allowance, my favorite. The little extra allows for a nice clean cut at the serger.
Picture break...


  • I could tell from the pattern layout that it has a very short rise, front and back - I calculated the total crotch length at 27", including the waistband. So I added 1 1/2" at the center front, cured out to 1/2" at the side edge. And added 1/2" across the entire back top edge. And needed every bit of the extra length in the rise.
  • The inseam is generous - I'm 5'7" and took up a 2 1/4" hem. 
  • The pattern difficulty is rated as Medium. Actually, it should be Easy. But the instructions assume one knows how to sew a pair of pants. Pretty much 'sew the seams and add the waistband'. Nothing there for the beginning sewist. 
How about another Hot Patterns Joyful T, done in lightweight cotton/rayon knit...


Well, I'm not over the moon with these pants - but I might make some more. Maybe in a fun ITY knit! Style Arc recommends jersey or slinky knit. I think 4-way stretch is really important to keep away the baggy saggy knees and so on.

Bye for now - and goodbye forever, emerald blue/green Laguna stretch fabric from Craftsy!

Coco