Friday, September 25, 2015

Vogue 9135 - Kathryn Brenne jacket


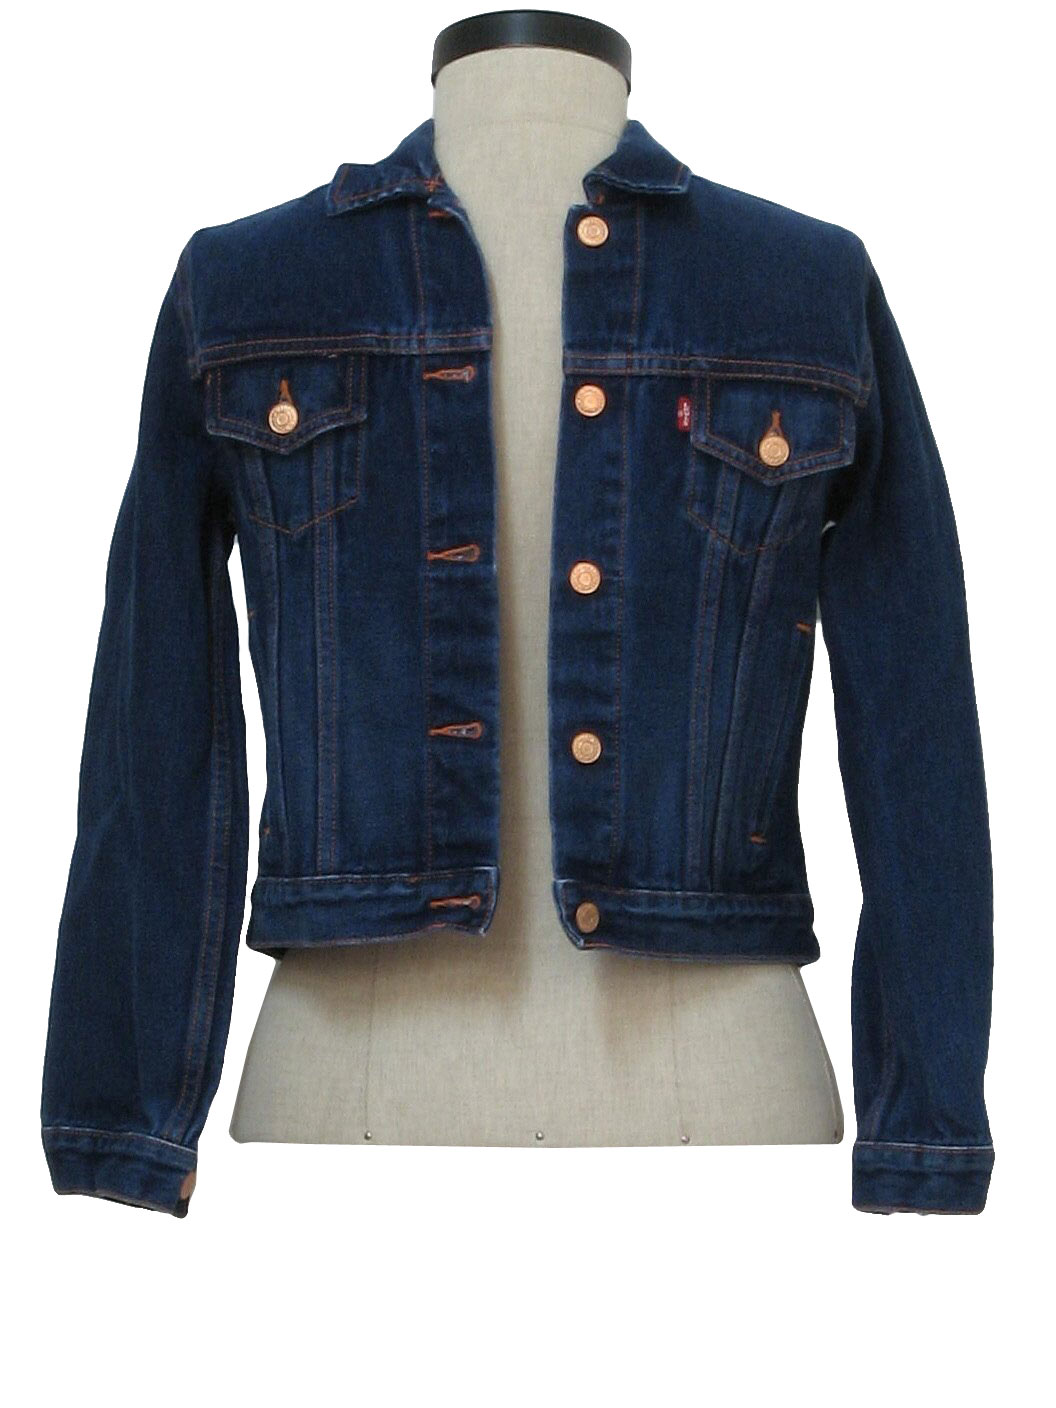
I had a blast making this jacket! 

I ordered this pattern as soon as it was released, cut it out in mid-August, and started sewing it in early September. And it took a while to sew and finish. So here we go - the fun and funky new jacket from Kathryn Brenne.


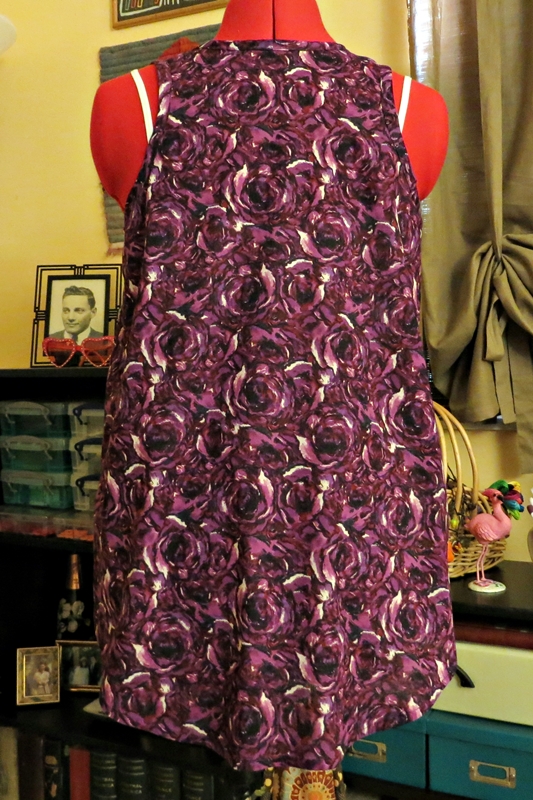
Curiously, I already had just the right fabric for it - a polyester faille I ordered from Fashion Mart in late December of last year. It was a possible choice for Ashley's wedding dress, which, in the end, I didn't make - she fell in love with a gorgeous lace overlay tea-length dress at David's Bridal.

Oh, let's look at it again :-) Love my girl.


The faille is a bit crisp and has lots of body. It has a corded weave, running horizontally selvedge to selvedge. And it ravels like that's it's mission in life, one or more cords at a time! So I serged all my pieces as soon as they were cut. I also put safety pins on every piece, to mark the right side of the fabric. The difference between the two sides is very subtle but mismatched pieces would have been evident on the finished garment.

Three cords to 1/4" ! Ravelling is costly on this fabric.

I adore all the gathered casings and ties on the jacket, front and back. Because the faille isn't drapey at all, self-fabric ties would have very difficult to make. Instead, I used braided cotton cord for the ties. I love how the cord looks on this jacket - it just kind of hangs around.

I just noticed that my right sleeve is not turned up in this pic :-)


I cheated once again on the casings and cords. The pattern instructions have a pretty inventive application of corset hooks and eyes, intended to secure a cord at the top end of the casing, and allow it to be drawn up at the bottom end.

Ummm...no. That hardware would be so bulky, heavy, and awkward in the middle of a garment. What I did instead:

  • Basted 3/8" elastic inside the casing ( inside and outside in the pic below), 
  • Sewed the casing to the garment on three sides, leaving the elastic-pokey end open,
  • Pulled up the elastic to gather the casing/garment,  
  • Attached the cording just inside the open end of the casing and trimmed the elastic, 
  • And sewed across that end of the casing to finish up - all nice and secure and no need to re-gather the casings every time a bow comes undone. Which they will do! As in all the rest of the pics in this post :-)


This is the same approach I used to sew the ties on Kathryn's pants, V9114 - here are the two pieces together!


A couple more sewing notes:

  • I sewed the size extra small!! This top is super wide from side to side. I generally sew a medium/12 or 14 in Vogue patterns.
  • The under collar is about an inch bigger than the upper collar, all around. It is folded forward over the upper collar and finished with mitered corners and topstitching. Tricky tricky with ravelling fabric - I messed it up on first try. So I trimmed about 1" from the top edge of both pieces and used a folded seam in the corner instead. No problem...
Right side of the upper collar, sitting on top of the under collar.

And that's it. I admit my enthusiasm flagged a few times as I was making this - it just seemed so big and awkward. But...


I love the finished jacket. It's unique, and it's truly a kick to wear. The fabric has lots of body, but it's very light, perfect for all seasons here in south Florida.

Ciao! Coco

Wednesday, September 23, 2015

Merchant & Mills - the Bantam Vest


Front

Time for more from the Merchant & Mills Workbook - the Bantam Vest. I love it!

It's such a simple pattern, just two pieces plus binding (or not). I think M&M really got the lines right on this one. String vests are not just for men! This one, for women, has such fun details: a curved hem, which drops in the back, nice deep armholes, and a racerback that fits just right across our angel wings.


Emile is my photo model today, since my post-surgery arms are not yet allowed to go flying over my head. The white straps are from Emile's camisole, so you can see pretty much where lingerie straps would fall. IMHO, a matching cami strap would be cute - I'll do it!

Back

I love the curve at the side of the hem and the back dip.


Side

This one is done in cotton lawn from Fashion Fabric Club. I'm crazy for this print. Lawn is perfect for this pattern - M&M uses a lot of lightweight linen, but I find it to be very scratchy, no matter how often it's washed. Other choices might be voile and challis, both of which would drape more than lawn or linen.

The binding...hard to see, but it's there. I don't use pattern pieces provided for bindings. Whether they fit really depends on the fabric - how could one pattern address all those possibilities. So years ago I taught myself to make long strips of binding (bias for wovens, across the stretch for knits) and attach them by fit and feel around the various curves on a garment. I generally start at CB and work all the way around, no pinning. All I can say is, it's fast, dependable, and not frustrating! I'm really glad I learned how to do this, since I seldom use facings on dresses or tops.


So, how to stop at one Bantam - can't do it! Here's a version in an unusual knit that I got ages ago from Fabric.com. My notes describe it as Florence nylon crushed jersey knit. It's very light, tissue weight, with horizontal slubs and heat-set crinkles. It has absolutely no vertical stretch, but about 30% horizontal stretch. 

I've avoided using it because it seemed a little scary! But it's perfect for the Bantam.

Front

I have the same fabric in off-white. Maybe I'll do another vest to wear layered under this orange one - it would be fun. 

Side
I tried doing hemming the bottom, but it just curled up. So I removed the stitching and ran a small straight stitch all way around, about 1/2" from the edge. Works fine, since jersey doesn't run, unless one really gives it a good yank. 

Back

I used French seams on both versions, and using them on a knit was a first for me. But they worked surprising well on this thin fabric.  I didn't apply binding on this one, I just turned the armhole and neck edges in 1/4", two times, and topstitched. The result is much slimmer straps.


One thing I didn't do was iron any part of this version! I tested a fabric scrap with the iron, and all the crinkles disappeared - completely flattened the knit. OK, so it's really wash & wear!


A few sewing notes:

  • I sewed the size 12.
  • M&M doesn't call their seaming technique a French seam - but it is. However, they suggest sewing it with half of the 5/8" SA in each of the two seam components. I really don't recommend that approach. IMHO, using 1/4" on the RS pass, and 3/8" on the WS pass, results in a nicer finish. 
  • Instead of using a French seam on the shoulders, I flat-felled them. This technique makes a nice, smooth, flat, and comfortable seam.
  • I took in the sides by 1/2" at each armhole, cured down 6".
  • And I redrafted the front hem a bit, to reduce what another blogger called the loin-cloth appearance. LOL - but it's true. I brought it up about 3/4" at CF, cured out in the curve on each side.
  • The lawn version used about 1.5 yards of 55" wide fabric. And the knit used only a yard!

Parting shot:

The anoles and lizards in my yard love to lay their little eggs in my hanging plants. The orchids, ferns, hoyas, and succulents. And Ms. Squirrel and the blue jays know it. A little feasting going on. Ms. Anole was caught looking a little unhappy with the situation...


Bye for now! Coco

Friday, September 18, 2015

Kwik Sew 2895 Denim Jacket - a second look


Levi's jacket from the 80's


Time to revisit a classic pattern, the good old jean jacket. It gets done in many ways, but I really admire the original Levi jacket - all those seams, welt and flap pockets, topstitching, brand buttons, orange/red button holes - what a  great look.

Here's the thing - I doubt that it's possible to make a convincing knockoff of the Levi classic. Maybe I should say it's not practical - it's sewn on industrial machines with fabric that's been treated in special ways, and with thread that we just can't source easily.

Solution? Buy one! I have a couple and love them. But I also like to fool around with sewing one. The leftover lightweight denim I used for my Strides trousers kind of stared at me and said 'jacket'. Time to pull out Kwik Sew 2895...


It's an easy pattern: the pieces fit together well, the instructions are great, and the collar is very cooperative. It has 36 reviews on Pattern Review! and seems a popular choice with sewists of many levels of experience. I sure like it.


It is really hard to photograph this fabric! A few sewing notes:

  • I made a muslin 2 years ago in white denim. And never wore it - it was a little snug on me. For this one, I stayed with the size Medium, but straightened the side seam from armscye to waistband, an increase of about 2" in the waist. The resulting relaxed bodice is much easier to wear.
  • I extended the cuff band to form a button tab. 
  • Because the collar does not have a collar stand, I added facings to the front and back neckline. I just don't like 'fold under and hand stitch' finish that's often suggested for this type of collar - it's messy.
  • And I got out the big snap tool and used antique brass button snaps instead of buttons. 


Fun with the inside, in wasabi green kona cotton. 


Here's that Pres-n-Snap tool, which I ordered from Sailrite a couple years ago. Kind of a splurge, but I love it. Because it's levered, I can close it easily, it's not at all hard to do. The 15 mm snaps are from Pacific Trimmings, a totally fun online store.


A note about denim: it ravels famously, in any weight, and it has a lot of bias stretch, even without any lycra. The first thing I did was to serge the edges on all my pattern pieces and staystitch any curves that might stretch out.

Now, about those britches - these are favorites, made with McCalls' 6291 cargo pants pattern in a tie-dye denim from JoAnns. I've worn this pair a few times on the blog, but I've never mentioned them specifically. The cargo pockets on the legs don't show in this pic, but they are there, no button flap. And the hem is plain, no elastic cuff.

Kirsten Kimono tee with 9" added to the sleeve


These pants are easy to make and easy to wear, with an elastic sewn-on waist that doesn't bunch up a lot. My very first version here...


And it's time for a fresh cup of coffee. I'm headed up to the loft, where I have a pair of purple pants in progress :-) Hope everyone enjoys a nice weekend.

Ciao! Coco

Tuesday, September 15, 2015

More Harem Pants ... grrrr


Hi to all! Well, I was kind of saving these pants for Jungle January...but just can't do it. I need to get back to blogging, it's Sewing Month, and I've been living in my Pattern Emporium Harem pants since my surgery in August. So here's the pair no one has seen.

I am in love love love with this pattern. My original post, with lots of chat about the pattern options and what I ended up sewing, is here - two pairs, both in ITY knit.


And I wore another pair, in black ITY knit when I blogged my B5954 knit tops...


 So this makes 4 pairs! All but the black have a plain hem...the black has a cuff, because I hemmed them too short and needed to add length. And I love them with the cuff. Kind of sexy. Maybe I should add cuffs to this latest pair!


this pic is the 'real' color...bright purples and white


Purple and animal print, my fav's. 

The fabric is a heat-crinkled ITY from Fabric Mart, and it's definitely not an everyday ITY. At first it seemed somewhat stiff and weird.  But it softened up in the laundry, so I kept it. I'm glad I did. Sometimes it pays to be patient and see what happens.

I even managed to keep the animals pretty much under control, so I don't have a blaring target in the wrong places!


Where did my head go in these pics? Truthfully, I just got out of the shower. And I can't reach above my head to do my hair yet. No way am I going to post a pic of my wet head!


I have 3 more pieces of animal print fabric in my stash, ready for January. Fabric and patterns - my weakness (aside from coffee).

It's been a nice day. I started a Merchant & Mills Bantam Vest this morning. It's not a big project and will be finished soon. In a rambunctious purple print lawn fabric...

Bye for now! Coco


Wednesday, September 9, 2015

A little unselfish sewing ...


Every once in a while, I sew for someone other than myself. Ok, not a lot, but a little bit. Christmas gifts for sure, and I always make something special for Ashley and Darrin, for their annual trip out to the San Diego ComicCon. This year, Ashley sent me some fabric for a dress - how cute is this! And do you think she likes Hello Kitty...

Darrin got a new rubber loop bracelet, his favorite, in black and gray. Who would have thought - these bracelets are a big hit with my son and grandson as well. In fact, I just got a special order for a couple in Florida Gator orange and blue.

But back to the dress, I've made this pattern about 5 times now for my girl. I drafted it several years ago from a pattern that looks nothing like this dress!


And a couple weeks ago, Ashley came over to help me with a surgery. It meant so much to me - she took FMLA from work, and it was such a comfort to have her with me. Not to mention how much she helped me afterwards. Before she came over, I made her a thank-you dress, in a little fancier fabric that she can wear with a shrug for casual Fridays.


(And I'm doing great. Not quite ready to model clothes yet, but almost there.)

Meanwhile, the super-nice person who helps me with yard work and small fix-ups around the house, and his wife, are expecting a little girl, their second child, this month. They're originally from Morocco, and I think it must be hard not to have any family nearby. I wanted to make something a little different for them, and at first I thought might do little flannel blankets. And then I remembered how popular gauze swaddling blankets are now with new moms. And how perfect for our Florida heat and humidity.


I started with a 5-yard x 44" wide piece of cotton gauze, which I thought would be enough for 4 blankets, 44' square. Nooo... when I pre-laundered it and took it out of the dryer, it was 2 feet shorter than when it went in! So enough for three blankies.

To finish the edges, I pressed out about 1" along the side seams, cut off the selvedges, and simply sewed a double-fold hem all the way around.


After another wash and dry, they are so nice and soft and airy. I want one!


Double Eye Needles


Before I could manage the stairs up to the sewing loft, I indulged in some online shopping - nothing wrong with my fingers! I finally got around to ordering a couple things I really need, both from Nancy's Notions - what a fun site, it has lots of interesting things I don't see everywhere.

I love double-eye needles for sinking serger tails back through the stitched seam - and I haven't found them anywhere else, in shops or online.  I lost one of my two needles somewhere in the sofa a couple weeks ago. Panic. At 2 for $2.75, they are a great tool. They also come in a pack of 10.


Tracing Paper


And I ordered 2 rolls of tracing paper. I really go through this stuff - just give me paper, scissors, and tape, and I'm happy.

These are 77 yards long and 21" wide, two rolls for $15 (it can be ordered by the single roll as well). What a good buy, much less than I've been paying at A.C. Moore. To make this a totally guilt-free little purchase, I also found a free shipping coupon online :-)

What next? Well, I'm back to sewing now. Before the surgery, I cut out and prepped a few garments - I knew that part would be difficult for a while. Fun stuff - Kathryn Brenne's new Vogue 9135 jacket, a Wiksten top re-drafted with a little swing, a Kwik Sew 2895 denim jacket, and a Morris blazer in black ponte. 

So I'm staying busy and grateful for such an easy recovery.

Bye for now - Coco